Casio fx-180Pa calculator easy fix for LCD display missing segments
It's a "Program FX" type calculator as Casio like to call it.
Typical education calculator supplied with an hard plastic protective case (not shown here).
Feature rich calculator for such a low cost machine.
It feels very light on the hand due to the reduction costs design choices.
This unit developed a fault in the LCD display, common on this type of calculators.
There were missing segments in some digits.
Although it was a easy fix. See below.
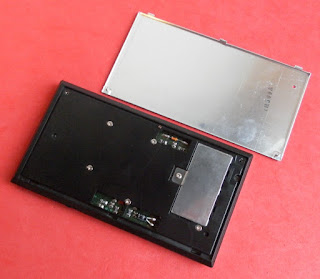
There is a reason for this back cover large recession.
To reduce production costs, this calculator uses the back cover as part of the keyboard assembly. Casio used this approach on other models too, like the ultra light and compact Casio fx-3900Pv model.
This is a unbelievable low current consumption design although being powered by a huge AA 1.5Volt battery cell.
Average power of just 0.00003 Watt translating to an avg current of 20µA.
The battery will last forever until eventually starts leaking and destroying the internal circuits.
The keyboard keys carbon contacts are installed at the back cover.
There is no conventional rigid PCB (print circuit board).
The keyboard matrix and SoC processor are deposited on a ultra thin plastic foil acting as a flex PCB that is fixed over the keyboard membrane by using melted plastic rivets.
There is no soldering at all. The battery bypass electrolytic capacitor leads are just melted to the plastic front cover, as well the battery terminals, and they connect to the main flex PCB by just the natural elastic pressure from the plastic foil with the help of the back cover.
To fix the missing LCD segments, I used an very old trick that can work most of the times on this kind of LCD "flat cable" connections where the "wires" are just conductive paint deposited over a thin plastic foil.
Because the are no real wires and no conventional soldering involved, we can't use conventional tools and techniques to fix it.
However plain hot air can fix this kind of faults.
So I used a conventional air dryer over the flex PCB near near the LCD "flat cable" interconnection for a couple of minutes. Job done. I got a new high contrast LCD display.


